THATCHING DOLLS HOUSES
By Martin Beacom of Bees Art
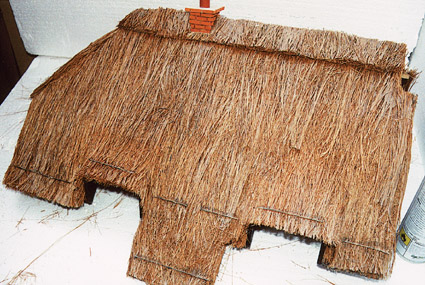
Thatch epitomises everyone's vision of the countryside. A little thatched cottage nestling in among the trees, smoke curling gently from the chimney! Well, if you cannot have the real thing at least you can have your own thatched doll's house.
Thatch was at one time the cheapest roofing material. Right back to the iron age thatches of turves, straw, bracken, heather, whatever was available locally, have been used. Even today, though no longer cheap, it is the only practical form of roof for some period buildings, where the structure cannot take the weight of slate or tiles. It is also an excellent insulator, keeping buildings warm in the winter and cool in the summer.
Thatches were of three main types: 'long straw' which is wheat straw, a by product of the grain harvest, 'wheat reed' or best of all 'Norfolk reed'. Norfolk reed grows in coastal marshes, estuaries and fresh water margins all over Britain and Europe. A thatch has a long life span - long straw 15-20 years, wheat reed up to 30 years but the most durable is the Norfolk reed which will last up to 80 years.
Over the years doll's houses have been thatched with many materials trying to simulate their full size counterparts, some more successful than others.
HOBBY'S have now added a material to their extensive range of dolls house products that is excellent for 1/12 scale thatch. Basically it is coconut fibre, which is a pleasant thatch brown colour and comes in straight lengths 180-190mm long. Before you rush off to thatch your latest dolls house, take time to study photos, painting etc., to get the authentic 'feel' for the shapes. For the best results (and easiest) it is preferable to have the roof as a separate one piece structure.
The following notes cover thatching the cottage on the front cover but can be adapted to any roof.
You will need: thatching material, Aerosol contact adhesive, PVA white glue, thin card.
It is advisable to use disposable gloves for the following procedures. Taking your roof structure, spray or paint all edges and under the eaves of the roof with black paint.
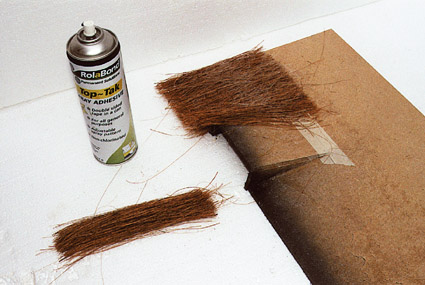
Remember you are laying thatch from the eaves (bottom edge) to the ridge (top edge) of the roof and from left to right. Setting the spray pattern on the aerosol spray head to H, spray the adhesive along the bottom edge of the roof to a height of about 200mm.
Apply fibre so that the length goes up the roof leaving a 25mm overhang at the bottom. Cover across the whole roof panel, left to right with the fibre respraying glue as necessary, so that the whole width is covered in a thin layer of fibres.
Where there are gable windows just lay the fibre over these areas to blend the shapes but always with the fibre length running from bottom to top.
Overspray with adhesive and apply second layer the same as the first to build up a thickness of thatch at the bottom edge.
Now with exactly the same procedure glue a layer 50-60mm up from the bottom edge.
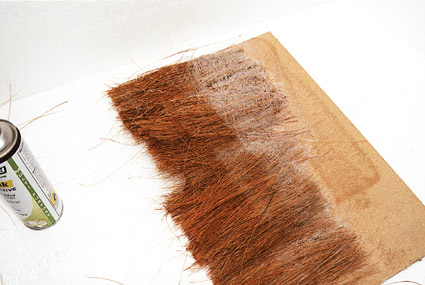
You will find the thatch will have a soft spongy feel. Keep the layers thin and keep spraying with the adhesive over the top, gently pressing down periodically and the thatch will slowly become one unit. Trim the eaves edge with scissors, but do not let it become too thick or it will be difficult to cut.
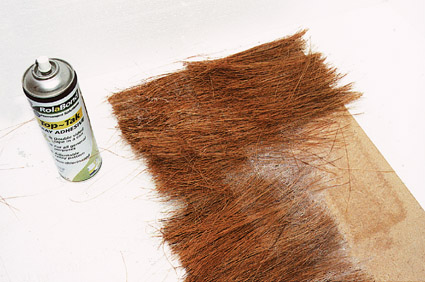
Work across the roof panel in this manner until the whole roof is covered. At the ridge (top) let the fibres overhang trimming at a later stage. The thatch can be added to, if you want it thicker, by starting at the eaves again with another layer but always work from the eaves upwards.
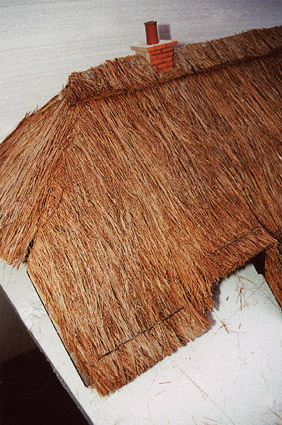
Thatch each panel separately. At hipped joints blend the thatch around the peak of the joint, always keeping the fibres vertical.
Periodically remove errant strands that do not run as you wish and give an occasional 'haircut' with scissors to keep things under control. Do not worry about the visibility of spray adhesive on finished areas at this stage, at worst it only represents cobwebs!
The ridge should be made as a separate item on a piece of card 50mm wide and long enough to span the ridge twice. Using the same procedure as before apply the thatch across the card (trim the fibres to shorter lengths for convenience). Build up to three layers of thickness and trim both edges with scissors. Fit to both sides of the ridge, making the top joint as good as possible and cutting around chimney stacks etc., this can be glued with contact adhesive or a hot melt glue gun.
Trim and titivate the roof until you are happy with its appearance. Now 'set' by brushing a coat of PVA glue (white wood glue) thinned 50% with water. This is a messy job because the model thatch rejects the liquid just like the real thing. So do it on a polythene sheet! Try to get the mixture to penetrate as far as possible by stippling in with a 25mm (1") paintbrush. Allow 24 hours to dry on the polythene sheet. The PVA will dry clear and harden the whole thatch. For the artistically inclined the edges of the ridge overlay can be scolloped. Work from photographs - much more authentic than your imagination.
The horizontal bands can be added from thin plastic rod, wire or thread, painted darker brown than the thatch.
Good luck with your project and we hope it is successful.


